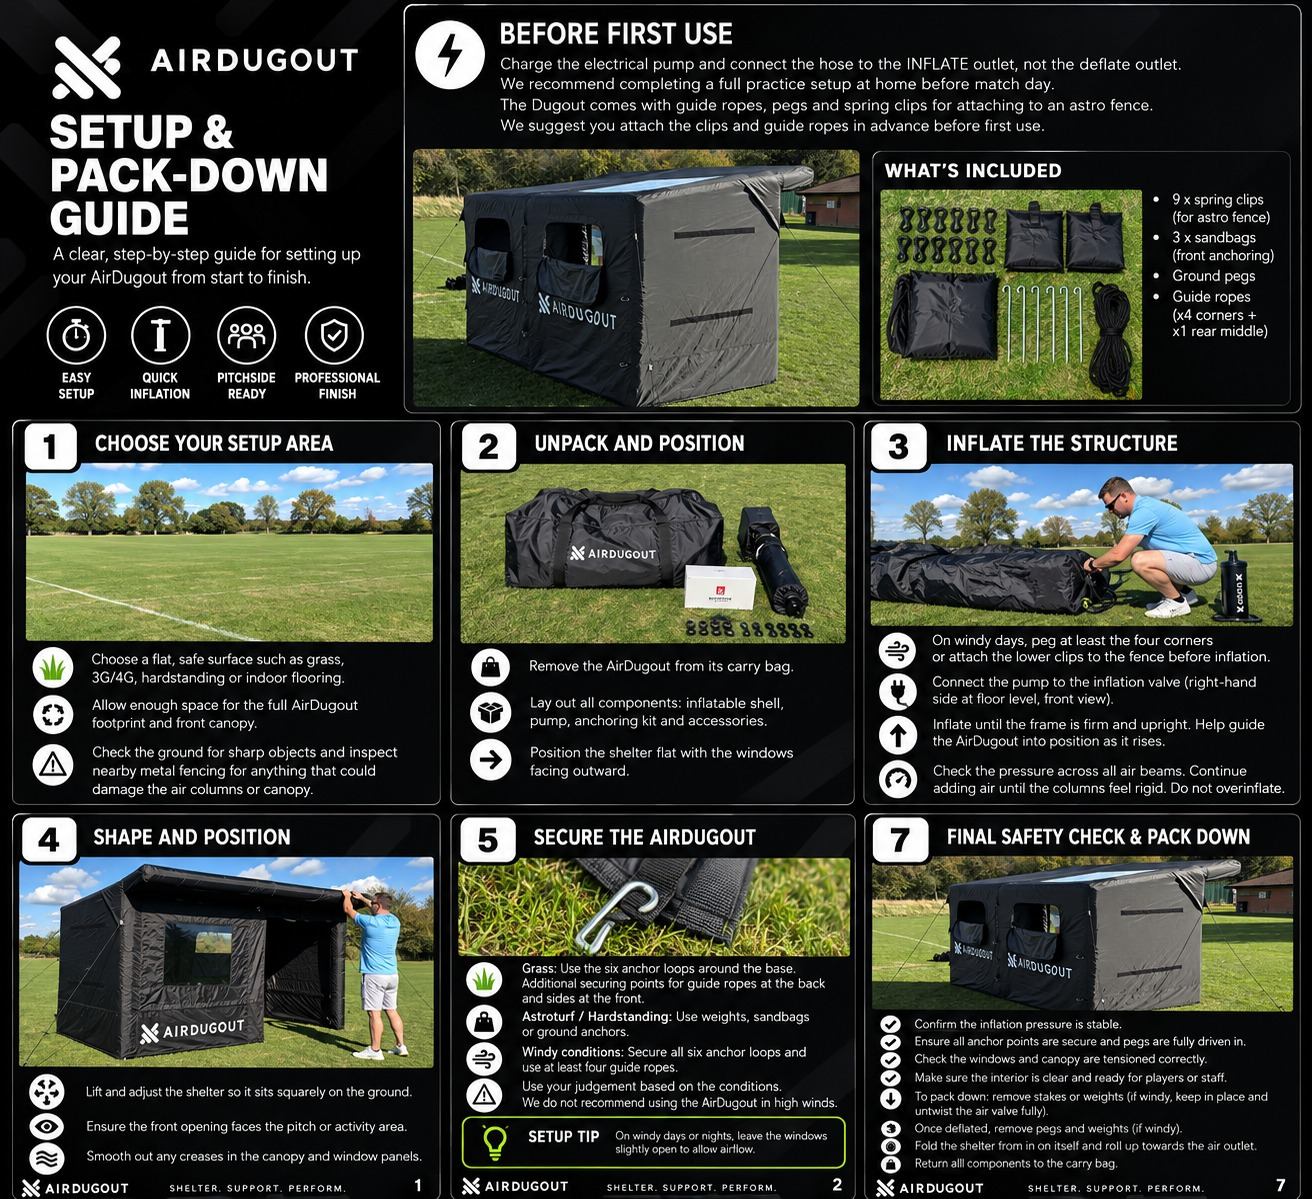
How to set up your AirDugOut
From unpacking and inflation to positioning and securing your shelter.
Press play to watch the guide here.
From the carry bag to the final whistle. Get to know your AirDugOut with simple setup steps, wind guidance and a smooth pack-down.
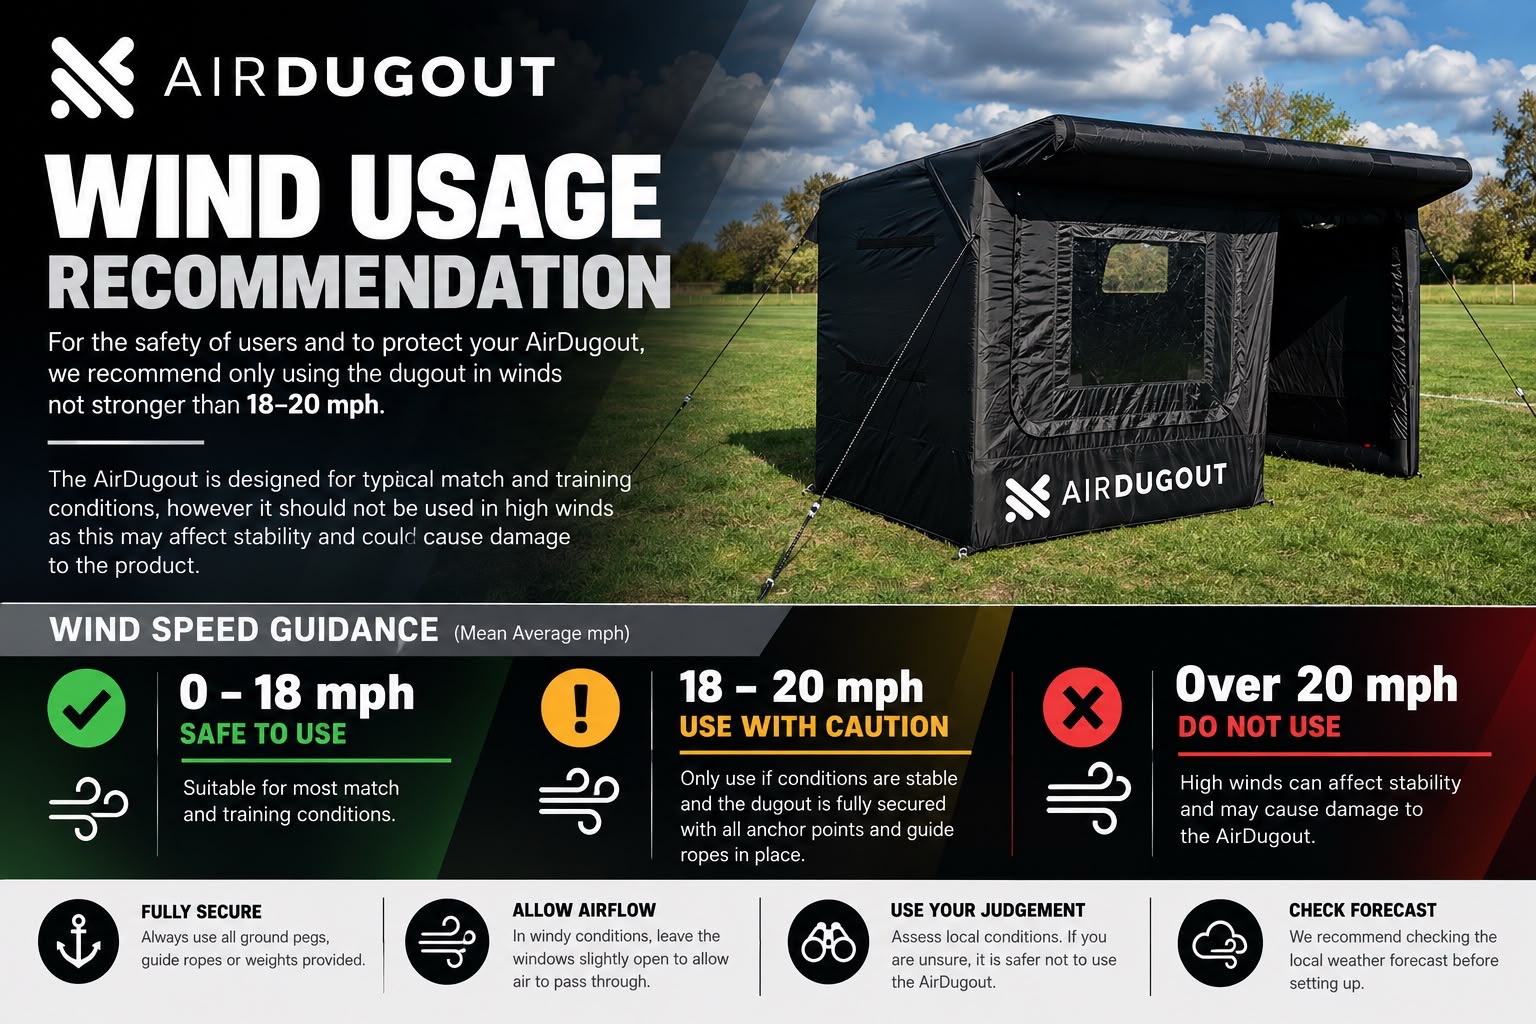
Check the wind before you start. Do not use above 20 mph.
Follow along with our setup and pack-down videos, then keep the written steps below to hand on match day.
From unpacking and inflation to positioning and securing your shelter.
Press play to watch the guide here.
Deflate, fold and return your shelter to the bag, ready for next time.
Press play to watch the guide here.
Try a full practice setup at home before match day. It’s the easiest way to get familiar with the pump, fixings and shelter.
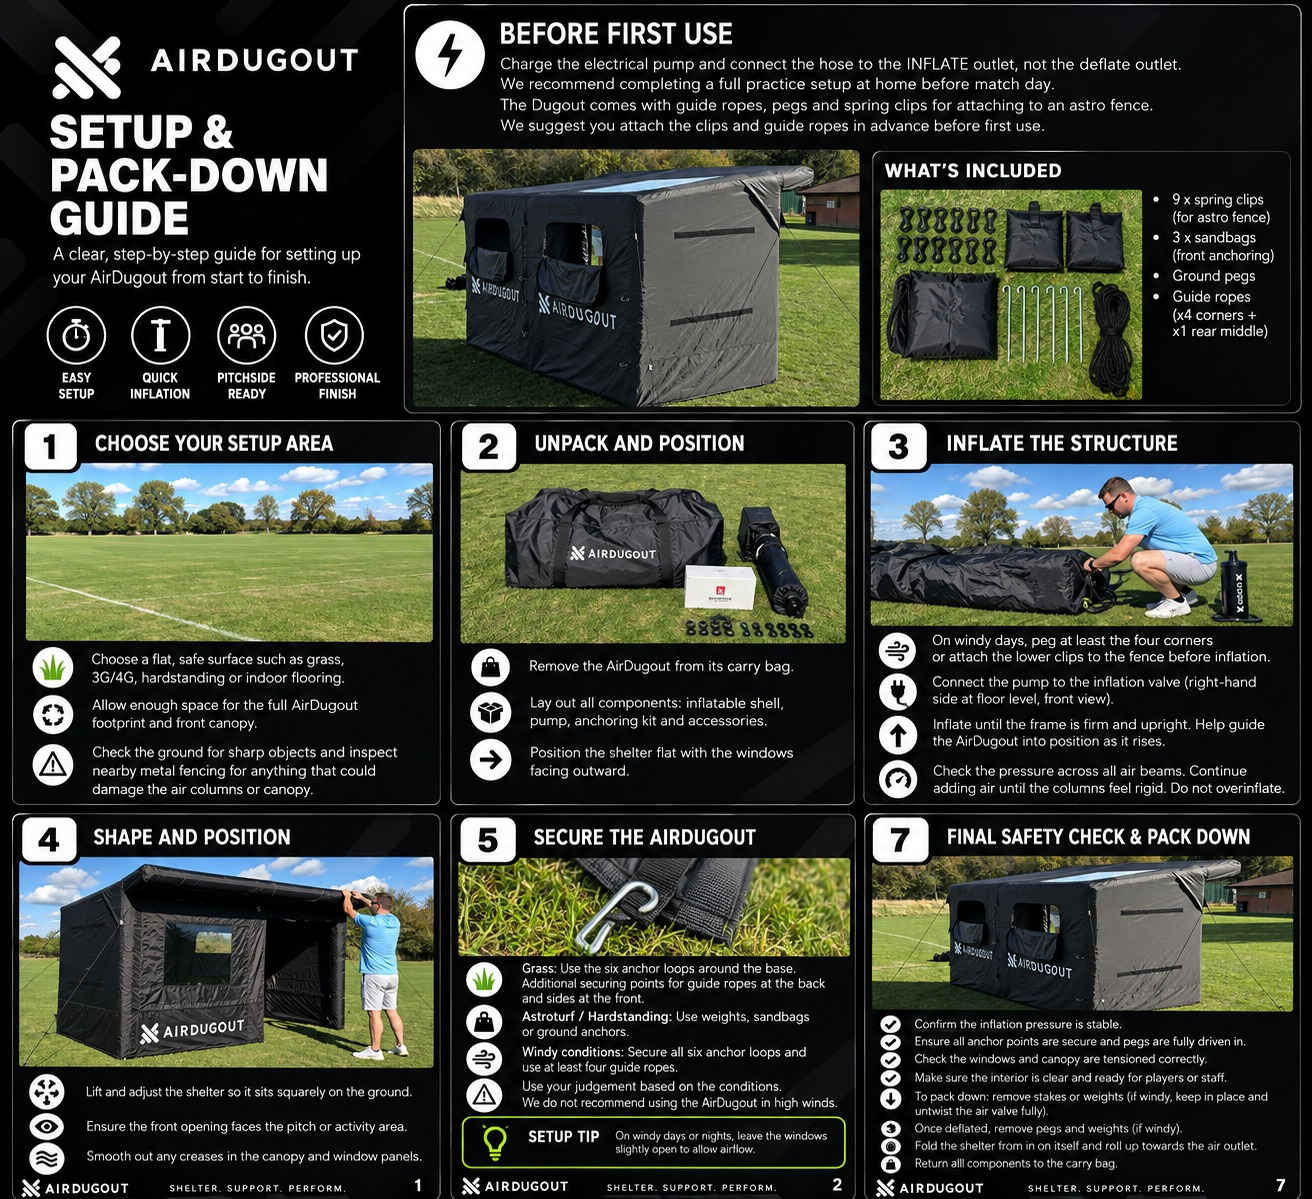
Shelter, electric pump and carry bag, plus your anchoring kit:
Work through these steps in order. Secure the shelter for your surface and always finish with a safety check.
Start with a flat, safe surface: grass, 3G/4G, hardstanding or indoor flooring.
Take the AirDugOut out of its carry bag and lay it flat, with the windows facing outward.
Connect the hose to the pump’s INFLATE outlet and the shelter’s inflation valve.
Lift and adjust the shelter so it sits squarely on the ground.
Use all six built-in anchor loops around the base. Attach guide ropes at the back and at the sides of the front opening.
Tick off each check before players or staff step inside.
Setup tip. On windy days or nights, leave the windows slightly open to allow airflow.
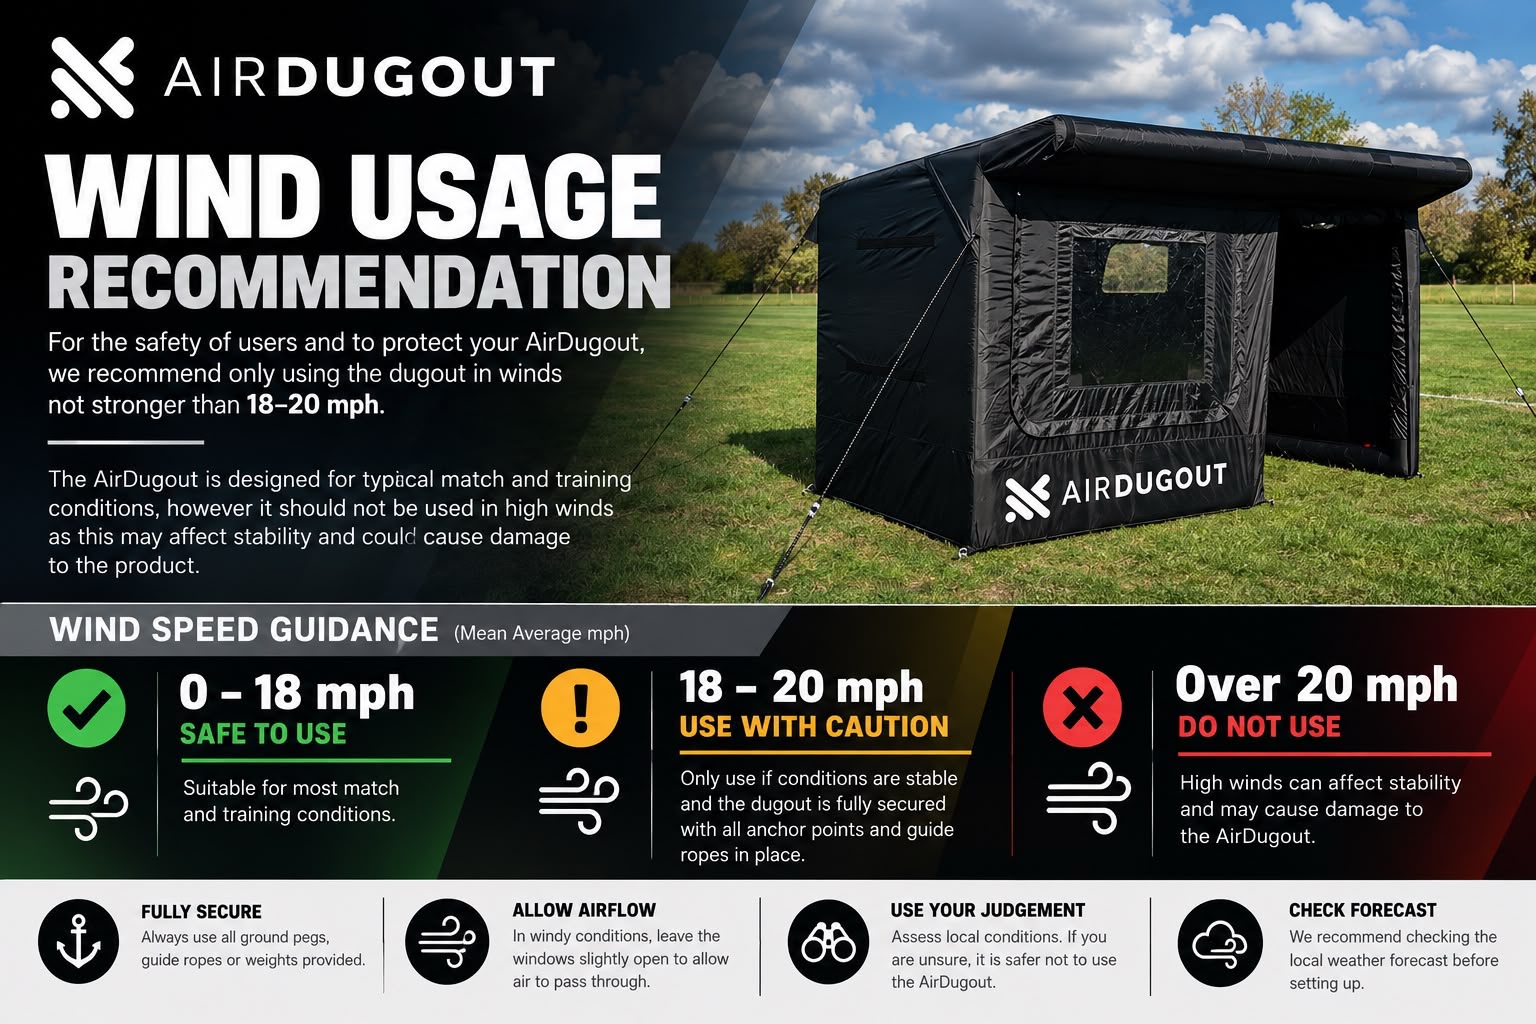
Your AirDugOut is designed for typical match and training conditions. High winds can affect stability and cause damage, even when the shelter is secured.
18–20 mph is the upper limit. Use caution in that range and do not use above 20 mph.
Wind speed guidance · Mean average mph
0–18 mph
Suitable for most match and training conditions. Always fully secure the shelter.
18–20 mph
Only use if conditions are stable and the shelter is fully secured, with all anchor points and guide ropes in place.
Over 20 mph
High winds can affect stability and may damage your AirDugOut. Do not set up or use the shelter.
Use all ground pegs, guide ropes or weights provided, as appropriate for your surface.
In windy conditions, leave the windows slightly open so air can pass through.
Assess local conditions. If you are unsure, it is safer not to use the AirDugOut.
Check the local weather forecast before setting up, and watch for changing conditions.
Take your time with pack-down so your AirDugOut is ready for its next outing.
Open the air valve and allow the shelter to deflate fully. In windy conditions, keep pegs and weights in place until all the air has escaped.
Once fully deflated, remove any remaining pegs and weights. Collect the clips, guide ropes and other accessories.
Fold the shelter in on itself, then roll towards the air outlet to push out the remaining air.
Put the shelter and all components back in the carry bag. Make sure the fabric is dry before storing it.
Keep it anchored in the wind. Leave pegs and weights in place while deflating, then remove them once the shelter is fully down.
Save the full setup and wind guidance posters for a quick reference on match day.
Find more care advice in our support guide, or get in touch with the team.